Assembling brass valves on an assembly line involves several critical steps that ensure the final product is functional, durable, and of high quality. Brass valves, commonly used in plumbing, heating systems, industrial applications, and automotive systems, require precise assembly to meet both design specifications and safety standards. Below is a detailed guide on how to effectively assemble brass valves in an assembly line.
1. Pre-Assembly Preparation
Before starting the assembly process, it’s essential to have all the necessary materials and tools ready.
a) Component Inspection
- Inspect individual parts such as valve bodies, stems, handles, O-rings, gaskets, seals, springs, and other components.
- Check for defects: Ensure the brass parts are free from cracks, blemishes, or imperfections that could affect functionality or aesthetics.
- Ensure proper dimensions: Verify that all parts meet the required size specifications and tolerances.
b) Tool and Equipment Setup
- Prepare the assembly tools, such as wrenches, screwdrivers, torque wrenches, press machines, and heat guns if needed.
- Ensure that automated equipment, like assembly jigs or robotic arms, is properly calibrated and functional.
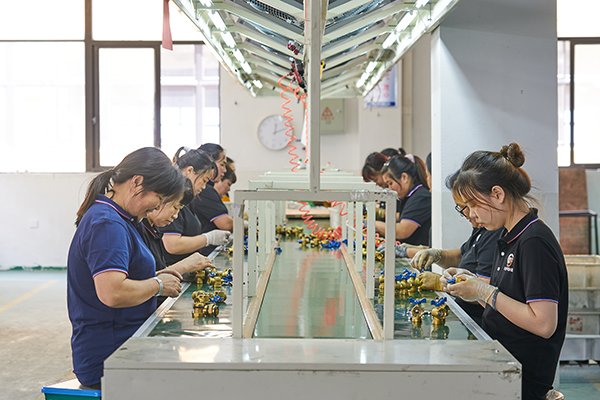
2. Brass Valve Assembly Steps
Step 1: Assembly Line Setup
- Station Organization: The assembly line should have clearly defined workstations, each responsible for a specific task. For example:
- Station 1: Valve body inspection and preparation.
- Station 2: Stem and handle installation.
- Station 3: Seals and gaskets assembly.
- Station 4: Final assembly and testing.
- Each workstation should have the necessary tools and components laid out in a sequence that minimizes movement and optimizes efficiency.
Step 2: Inserting the Valve Stem
- Insert the Stem into the Valve Body: The valve stem connects to the valve body and controls the flow of fluid or gas.
- For ball valves, the stem is usually inserted through the valve body and attached to the ball mechanism.
- For gate or globe valves, the stem connects to the valve seat or gate that moves to open or close the valve.
- Secure the Stem: Ensure that the stem is properly aligned and securely attached to the body. If the valve uses a threaded stem, the threads should be lubricated to ensure smooth operation.
Step 3: Installing Seals and O-Rings
- O-Ring Placement: O-rings and seals play a crucial role in ensuring the valve’s leak-proof functionality.
- Apply lubricant (usually a silicone-based or oil-based lubricant) to the O-rings to ensure they fit properly into their respective grooves.
- Carefully place the O-ring or gasket in the designated groove on the valve body, ensuring it’s aligned and seated evenly.
- Check for Proper Fit: Ensure the O-rings or seals are not twisted or damaged during installation.
Step 4: Handle Installation
- Attach the Handle: Depending on the valve type (e.g., ball valves, gate valves, globe valves), the handle or actuator is attached to the valve stem. The handle provides manual control for opening and closing the valve.
- For ball valves, the handle typically has a quarter-turn action.
- For gate valves, the handle may be connected via a threaded mechanism for slow opening/closing.
- Secure the Handle: Tighten any fasteners, screws, or bolts that hold the handle in place. Ensure the handle moves smoothly but doesn’t wobble or become loose.
Step 5: Assembling the Valve Cover (if applicable)
- Place the Valve Cover: Some valves (such as pressure relief valves or safety valves) may require a cover to enclose the internal components, such as the spring mechanism or pressure adjustment screws.
- Ensure the valve cover is aligned with the valve body and that the gasket or seal around the cover is intact.
- Fasten the Valve Cover: Secure the cover with screws or bolts, ensuring it’s tight enough to prevent leaks but not overly tight to avoid damaging the cover or gasket.
Step 6: Installing Springs or Internal Mechanisms
- Install Internal Components: If the valve design includes internal mechanisms like springs, pressure regulators, or ball seats, these should be placed inside the valve body in their designated positions.
- For pressure relief valves, the spring mechanism should be aligned and calibrated to ensure it operates within the specified pressure range.
- Ensure that the spring or regulator is seated correctly and can move freely without obstruction.
Step 7: Final Assembly and Tightening
- Fasten All Bolts and Screws: Go over all the threaded parts of the valve, such as the valve body, stem, cover, and handle, to ensure they are tightly secured. Tighten with a torque wrench to the specified torque value to avoid over-tightening, which can cause damage, or under-tightening, which could lead to leaks.
- Double-Check the Alignment: Make sure the handle operates smoothly and that all moving parts function without obstruction.
3. Testing and Quality Control
Once the brass valves are fully assembled, quality control is a critical step to ensure they meet all operational standards and specifications.
Step 1: Leak Testing
- Pressure Testing: Subject the assembled valves to a pressure test to ensure they can withstand the designated pressure ratings without leaking.
- For hydraulic testing, the valve is exposed to high-pressure water or air to test for leaks at the body, stem, and seat.
- Leak detectors can be used to identify small leaks at seals, gaskets, or threads.
Step 2: Functional Testing
- Actuation Check: Verify that the valve’s actuating mechanism (handle, knob, or automated actuator) operates smoothly.
- For manual valves, check that the valve opens and closes fully with minimal effort.
- For motorized valves, check that the actuator responds accurately to control signals (e.g., through remote control or automation).
Step 3: Visual Inspection
- Check for Defects: Visually inspect the brass valve for surface imperfections, such as scratches, blemishes, or discoloration. The valve should be free from visible defects that could compromise its performance or appearance.
Step 4: Final Documentation
- After passing all tests, record the results in a quality control log for traceability. Mark the valve as approved for shipment or ready for packaging.
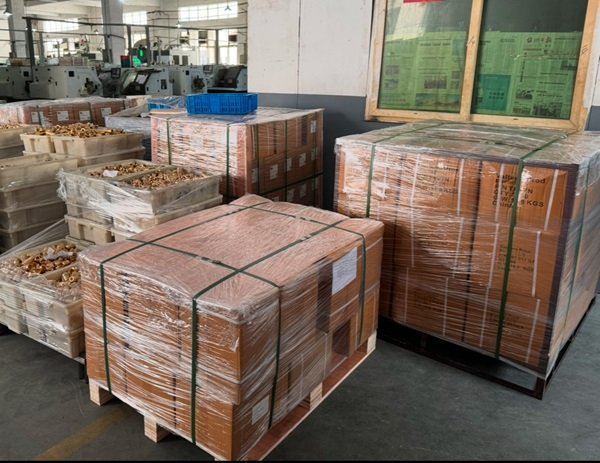
4. Packaging and Shipping
- Clean the Valves: Clean the assembled brass valves to remove any oils, lubricants, or dust accumulated during assembly.
- Labeling: Ensure that each valve is properly labeled with necessary information such as the part number, model, pressure rating, and any certification marks (e.g., CE, ISO).
- Packaging: Package the valves carefully to prevent damage during transport. Use foam inserts or plastic wrapping for protection and ensure that each package is clearly marked for its destination.
- Shipping: The valves are then ready to be shipped to customers, wholesalers, or other manufacturing plants.
5. Automation and Robotics in Brass Valve Assembly
In modern assembly lines, automation and robotics play a key role in improving speed, efficiency, and precision in valve assembly:
- Automated Robots can be used to place seals, insert stems, and even screw fasteners into place with high precision.
- Automated Torque Control: To ensure all components are fastened with the correct force, some systems use automated torque control to precisely tighten screws and bolts.
- Vision Systems: Cameras or vision sensors can be used to visually inspect parts for defects or misalignment.
Conclusion:
Assembling brass valves in an assembly line requires careful coordination of multiple tasks to ensure that each valve meets design specifications and quality standards. From inspecting and preparing components to performing detailed assembly operations like stem insertion, gasket placement, and handle attachment, each step must be executed with precision. Post-assembly testing and quality control ensure the valves are leak-free, functional, and durable. With the help of automation and quality checks, the assembly process can be streamlined for higher production efficiency while maintaining high standards of performance and safety.
Choose IVALVECRAFT, choose reliable partner, enjoy the high quality and best service.