When your heating system isn’t performing efficiently, your thermostatic radiator valve (TRV) may be to blame. Problems such as uneven heating, cold spots, or high energy bills can arise if your TRV isn’t functioning properly. These issues could escalate into costly repairs and uncomfortable living or working conditions. Understanding how a TRV works and how to maintain it can solve many of these problems. In this article, we’ll explain how TRVs work and how to troubleshoot common issues.
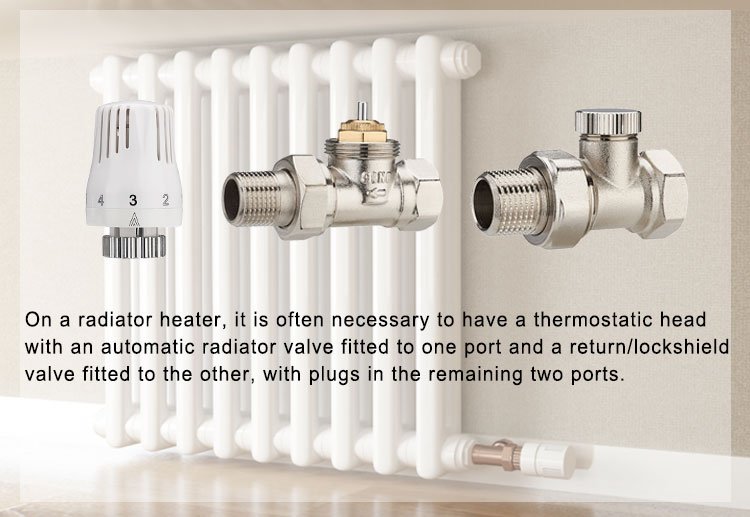
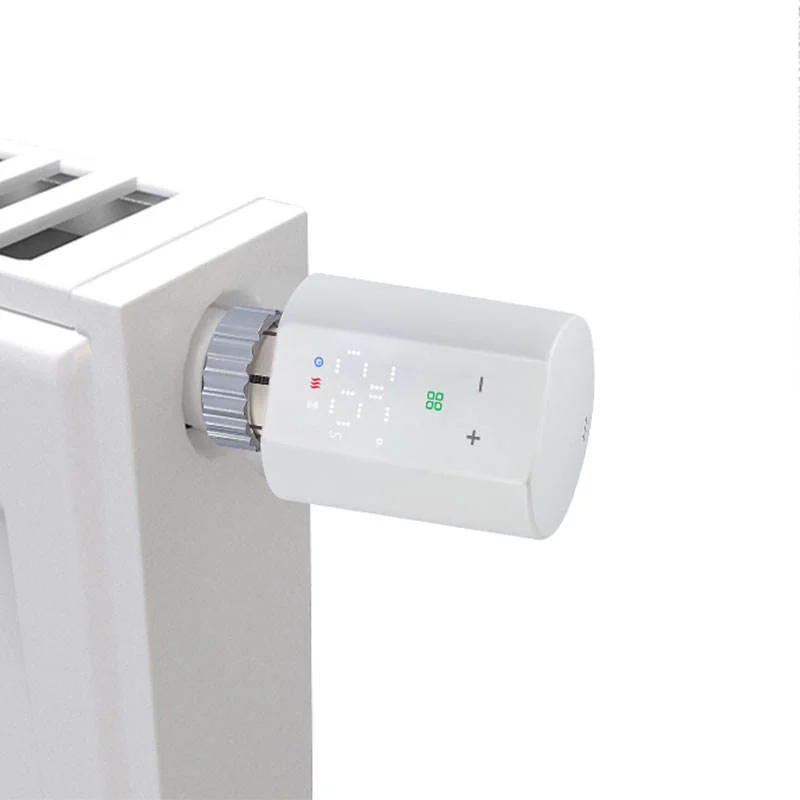
A thermostatic radiator valve (TRV) regulates the temperature in a room by controlling the flow of hot water into the radiator. Understanding how this device works can help you maintain a comfortable and efficient heating system.
If you’re experiencing issues with your heating system, or just want to learn more about how a TRV operates, you’re in the right place. Let’s take a closer look at the mechanics behind TRVs and how to troubleshoot or replace them if needed.
Can I Replace a Radiator Valve Myself?
Replacing a radiator valve may seem intimidating, but it’s definitely something you can do yourself if you follow the right steps. Many people choose to replace a radiator valve to improve the efficiency of their heating system or to fix issues like leaks or malfunctioning thermostats.
1. Identify the Type of Valve
Before you begin, you need to identify the type of valve you’re dealing with. Radiator valves come in different forms, including manual valves and thermostatic radiator valves (TRVs). If you are replacing a TRV, the process will differ slightly from replacing a manual valve, so make sure you know what you’re working with.
2. Turn Off the Heating System
First and foremost, ensure that your heating system is turned off and the radiator is cool. This will prevent any risk of burns or hot water spillage when removing the valve.
3. Close the Radiator Valve Handle
Next, use the radiator valve handle to close off the flow of water to the radiator. This will stop the water from leaking out when you start disconnecting the valve.
4. Loosen the Valve Fittings
Use a spanner or wrench to loosen the nuts holding the radiator valve in place. You might need to use some force, especially if the valve has been in place for a while. Be sure to support the radiator while you remove the valve to avoid any strain or damage.
5. Install the New Valve
Once the old valve is removed, fit the new valve in place. Ensure that the threads are aligned correctly to avoid leaks. Tighten the fittings securely, but be cautious not to overtighten, as this could damage the valve or pipes.
6. Check for Leaks
Once everything is reassembled, turn the heating system back on and check for any leaks around the valve. If you notice any, tighten the fittings slightly or check if the valve is properly seated.

Can You Replace a Radiator Valve Without Draining the System?
In many cases, it’s possible to replace a radiator valve without draining the entire heating system. This is a huge advantage as it saves you time and effort, especially in larger systems. However, it’s important to note that there are some precautions you need to take.
1. Use a Radiator Valve Shut-Off
Before starting the replacement, you should close the valve shut-off or isolation valves on both the flow and return pipes connected to the radiator. This will prevent water from leaking out when you remove the old valve.
2. Drain the Radiator
While you don’t need to drain the entire system, you will likely need to drain the water out of the radiator itself. To do this, use the radiator air valve at the top of the radiator to release any air, then place a container underneath the valve to catch any remaining water that drains out.
3. Replace the Valve
Once the radiator is drained, follow the same steps as if you were replacing the valve in a system that’s already drained. Remove the old valve, install the new one, and make sure the fittings are secure.
4. Refill the System
After the new valve is installed, you can refill the radiator with water. Open the isolation valves and check for any leaks. If everything is secure, you’re good to go.
How to Replace a Thermostatic Radiator Valve?
Replacing a thermostatic radiator valve (TRV) is similar to replacing a manual valve, but there are a few key differences. TRVs are designed to regulate the temperature of a room by automatically adjusting the flow of hot water into the radiator. Over time, these valves can wear out or malfunction, requiring replacement.
1. Turn Off the Heating System
Just as with any valve replacement, the first step is to ensure that the heating system is turned off. Wait for the radiator to cool down before beginning work.
2. Remove the Old Thermostatic Head
For a TRV replacement, you’ll need to remove the thermostatic head, which is usually the part of the valve that you adjust to set the temperature. Unscrew the head from the valve body by turnin
3. Disconnect the Valve
Next, use a wrench to disconnect the radiator valve knob from the valve body. Loosen the nuts and carefully pull the valve away from the radiator. Be cautious to avoid any leaks.
4. Install the New TRV
Now, install the new thermostatic radiator valve by following the manufacturer’s instructions. Attach the valve body and thermostatic head. Make sure all the connections are tight to prevent leaks.
5. Test the System
Once the new TRV is installed, turn the heating system back on and check the radiator for leaks. Adjust the temperature setting on the new TRV and ensure that it’s functioning as expected.
Should the Radiator Valve Be Open?
This is a question many homeowners and heating system operators ask when they encounter issues with temperature regulation or uneven heating. The answer depends on how you want to control the temperature of your room and how your heating system is set up.
1. The Role of the Thermostatic Valve
The radiator valve handle on most TRVs should be left open to allow hot water to circulate through the radiator. The thermostatic valve will automatically adjust the flow of water based on the room temperature, which helps maintain a consistent and comfortable environment.
2. When to Adjust the Valve
In some cases, such as when you want to prevent overheating or conserve energy, you might close the valve partially or completely. However, the valve should generally be left open for normal operation.
3. Balancing the Flow
In multi-radiator systems, it’s important to balance the flow by adjusting the valves on each radiator. If you have a TRV installed, the valve will regulate the flow based on the room temperature. However, it’s still important to ensure the lockshield valve is adjusted properly to maintain even heating.
Summary
A thermostatic radiator valve (TRV) is a crucial component in regulating the temperature in your heating system. Understanding how it works and how to maintain or replace it can help you avoid inefficiency, leaks, and discomfort. Whether you’re replacing a valve yourself or just maintaining it, ensuring that your TRVs are in good condition will help keep your heating system running smoothly.
Choose IVALVECRAFT, choose reliable partner, enjoy the high quality and best service.