Mounting a ball valve to a wall can be a challenging task, especially if you’re not familiar with the process. Improper installation can lead to leaks, unstable water pressure, or even damage to your plumbing system. These issues can result in costly repairs and disruptions to your daily operations. But don’t worry—this guide will walk you through the step-by-step process to ensure a secure and efficient installation. By following these instructions, you can avoid common pitfalls and achieve a professional result.
To mount a ball valve to a wall, you need to secure it using a mounting bracket or a valve holder. First, mark the position on the wall, drill holes, and attach the bracket. Then, fix the ball valve to the bracket using screws or clamps. Ensure the valve is aligned properly and test for leaks after installation.
Ready to dive deeper? Let’s explore the detailed steps for mounting a ball valve in different scenarios, ensuring you have all the knowledge needed for a flawless installation.

How to Install a Ball Valve in a Water Tank?
Installing a ball valve in a water tank requires precision to ensure proper functionality and prevent leaks. Here’s how to do it:
- Choose the Right Valve: Select a brass ball valve threaded or stainless steel ball valve that matches the tank’s specifications. Ensure it has the correct size and pressure rating.
- Prepare the Tank: Turn off the water supply and drain the tank completely. Clean the area where the valve will be installed to remove any debris.
- Mark the Position: Use a marker to indicate where the valve will be installed. Ensure the location is easily accessible for future maintenance.
- Drill the Hole: Carefully drill a hole in the tank at the marked position. Use a hole saw that matches the valve’s diameter.
- Install the Valve: Insert the valve into the hole and secure it with a locknut or threaded fitting. Use a wrench to tighten it, but avoid over-tightening to prevent damage.
- Test for Leaks: Turn on the water supply and check for leaks. If any leaks are detected, tighten the connections further or use thread seal tape.
By following these steps, you can ensure a secure and leak-free installation of a ball valve in your water tank.
How to Install Ball Valve on Copper Pipe?
Installing a ball valve on a copper pipe is a common task in plumbing systems. Here’s a step-by-step guide:
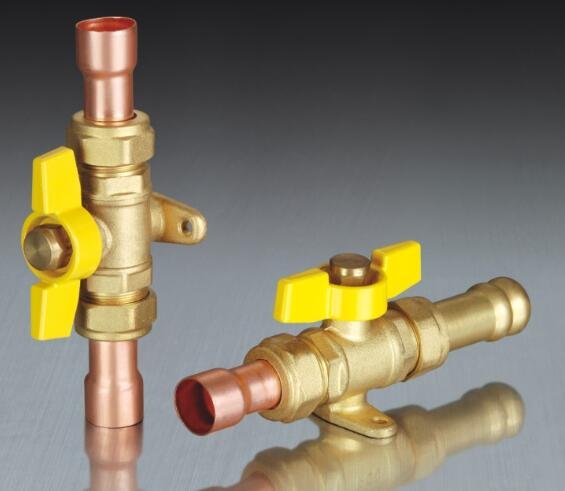
- Gather Tools and Materials: You’ll need a brass ball valve sweat or ball valve sweat, pipe cutter, soldering kit, and flux.
- Cut the Pipe: Use a pipe cutter to cut the copper pipe at the desired location. Ensure the cut is clean and straight.
- Clean the Pipe: Use sandpaper or a wire brush to clean the ends of the pipe and the inside of the valve. Apply flux to both surfaces to ensure a strong bond.
- Assemble the Valve: Slide the valve onto the pipe and align it properly. Ensure the valve handle is in a convenient position for operation.
- Solder the Joint: Heat the joint with a torch and apply solder. The solder will melt and flow into the joint, creating a watertight seal. Allow it to cool completely.
- Test the Installation: Turn on the water supply and check for leaks. If any leaks are found, reheat the joint and apply more solder.
This method ensures a durable and reliable connection for your copper pipe system.
How to Install a Ball Valve in a PVC Water Line?
Installing a ball valve in a PVC water line is straightforward if you follow these steps:
- Select the Valve: Choose a ball valve male female or brass ball valve threaded that fits your PVC pipe size.
- Cut the PVC Pipe: Use a PVC pipe cutter to cut the pipe at the desired location. Ensure the cut is clean and free of burrs.
- Dry Fit the Valve: Assemble the valve and pipes without glue to ensure proper alignment and fit.
- Apply PVC Cement: Clean the pipe ends and the inside of the valve with PVC primer. Apply PVC cement to both surfaces.
- Connect the Valve: Quickly insert the pipe into the valve and hold it in place for a few seconds to allow the cement to set.
- Test for Leaks: Once the cement has cured, turn on the water supply and check for leaks. If any leaks are detected, reapply cement and allow it to cure again.
This process ensures a secure and leak-free installation in your PVC water line.
Summary
Mounting a ball valve to a wall or installing it in different plumbing systems doesn’t have to be complicated. By following the detailed steps outlined above, you can ensure a secure, leak-free, and professional installation. Whether you’re working with a water tank, copper pipe, or PVC water line, the key is to choose the right valve and follow the correct procedures.
Choose IVALVECRAFT, choose reliable partner, enjoy the high quality and best service.